A manakin for the craft room

The craft room is my favourite room in the house, not surprising really! And I’m happy to say that I finally got myself a manakin and have begun to decorate it too!

20140331-205226.jpg

I couldn’t decide whether to use paper or fabric to cover the body but in the end I settled for a spare free wallpaper sample I had lying around.

>

20140331-205352.jpg

20140331-205400.jpg

20140331-205423.jpg

20140331-205434.jpg

20140331-205441.jpg

And here it is, pride of place!

>

20140331-205531.jpg

20140331-205546.jpg

Also, for those of you who are beady eyed, you may have noticed I’ve got a new light in this room. Another dollhouse show bargain at £3!


20140331-205742.jpg

Finally got my chandelier!

So yesterday at Miniatura the dollhouse show in Birmingham I finally took the plunge and purchased the chandelier for my ballroom.

I was so lucky and actually managed to get it for less than half price as it had been used as a show model. Not content with just accepting this cheapness I decided to invest in a few accessories to personalise it. (It would have been rude not to, right?)

20140331-202108.jpg

>

20140331-202207.jpg

It was pretty convenient that I had the chandelier with me when I bought the accessories, it meant I could ‘try on’ the different pieces for size. Handy as my size estimation isn’t great.

The went for some ‘cuffs’ for each of the candle arms and some sparkles for the top. I’m pretty pleased with the results, simple but effective! And I managed the whole thing for just £10!

>

20140331-202627.jpg

20140331-202742.jpg

20140331-202817.jpg

20140331-202850.jpg

20140331-202910.jpg

Flooring for the Ballroom

I’ve finally made a decision about the decor in the large, ballroom area of the house.

The walls were all painted cream (as per usual) with two walls on either floor wallpapered in a subtle patterned cream.

I wanted to either tile the ballroom floor (although i’ve done a far bit of that in the house already) or apply a wooden flooring. I really didnt want to use a paper image flooring that you can get as I didnt think this would look very good. I found an old laminate door cover in the garage. Essentially it is a wood textured sticky back plastic. This worked in my favour though as it was easy to cut  and apply. Although I did have to use glue as the sticky back wasnt all that sticky afterall… and that brought with it additional problems of air bubbles in the floor.

1922275_10152205460815033_25010960_n(Before)

IMG_20140306_215041

IMG_20140309_085351

IMG_20140309_085602

IMG_20140309_085811

The Finished Granite Floor

Ta-dah!

IMG_20140309_084810

In hindsight I think the floor tiles are possibly too far apart, however I’d have needed to buy a second clay to create more tiles so I tried to stretch them. For only my second attempt however I am pleased with the result and, as the tiles and polyfilla were laid onto a sheet and not applied directly to the base, I can change them at a later date if I decide otherwise.

Now to add the jar ceiling light I made earlier! Waiting for glue to dry whilst holding the object is very tiring, so I decided to improvise…

IMG_20140309_085101

Charm Box Sofa

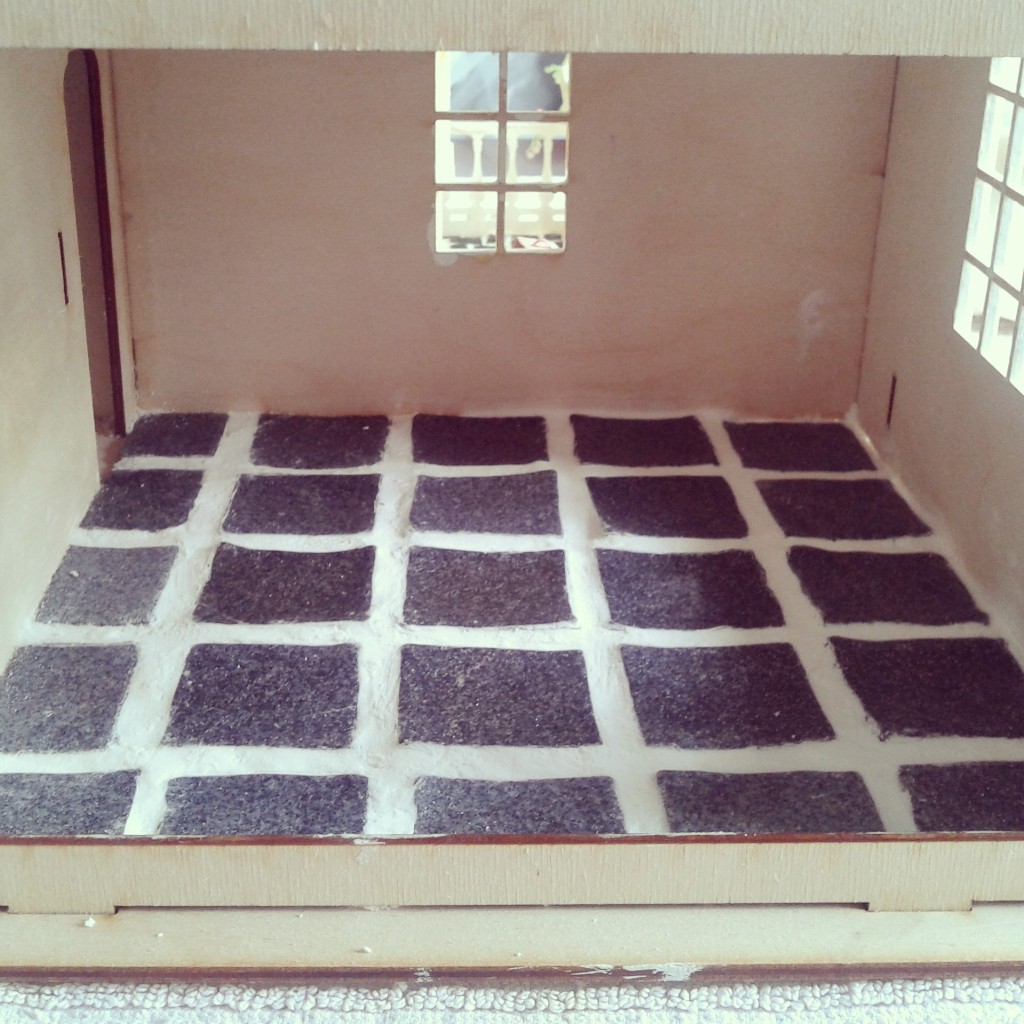
As you’ve probably seen in my posts to date, my lounge is currently furniture-less. The furniture I had left over from my original dollhouse was too large for the room in this house and so I needed to find an alternative.

The original plan was to buy a sofa set for the new house. However, whilst scrolling through various websites looking for perfect piece I stumbled across a corner suite which would fit in perfectly with the layout of the room (but not the decor as it was stripey!). I planned instead to make my own corner sofa using small pieces of square dowel and then covering the frame with foam and fabric.

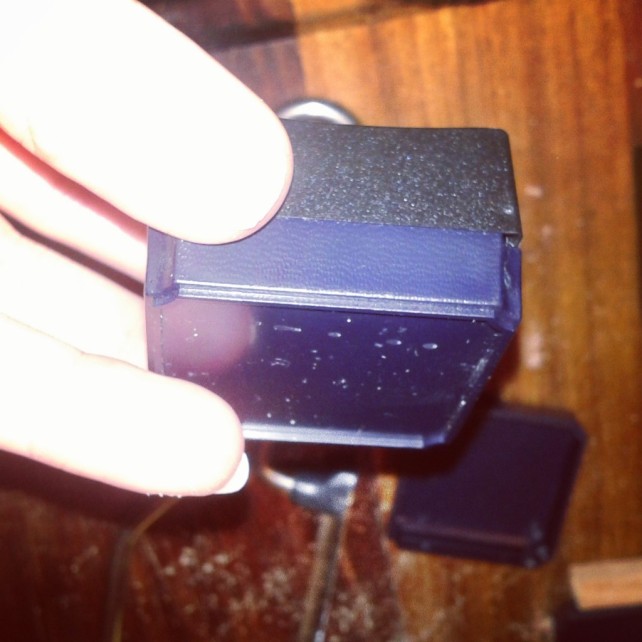
Even better than this, I found a stash of old charm boxes in our craft room which were the perfect size and shape for the frame I was intending to create. The charm boxes even had foam padding which I could use for sofa cushions!

IMG_20140302_114048

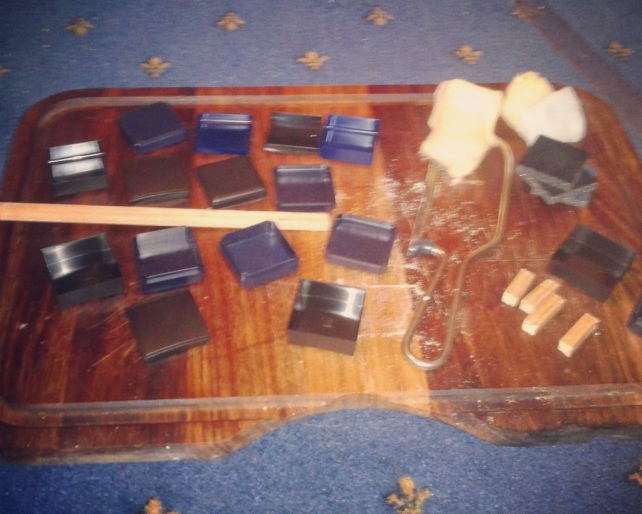
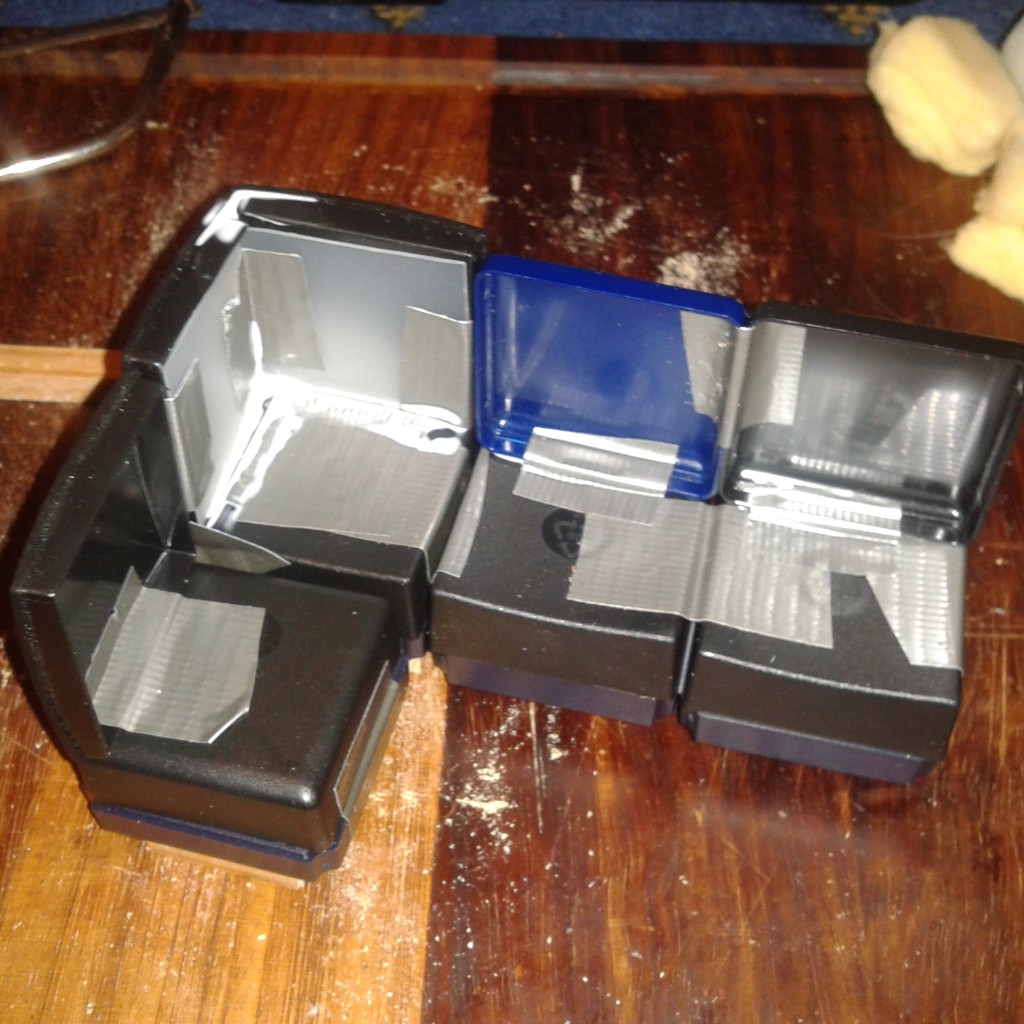
I set to work pairing the bottoms of the boxes with ones of equal size to give the chairs the height they would need. Some of the boxes had shaped corners to I made sure all these would be used as the chair bottoms whilst the plainer, square bottoms were used for the seats. The lids of each box would then be used as the chair backs.

IMG_20140302_114302

IMG_20140302_114844

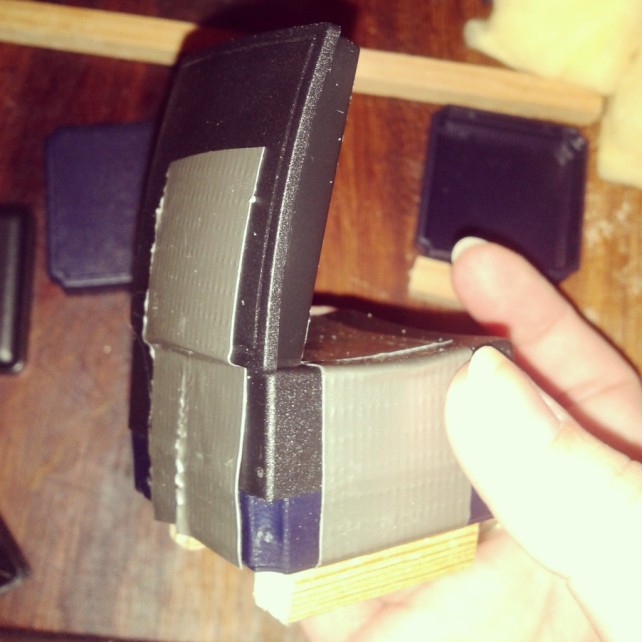
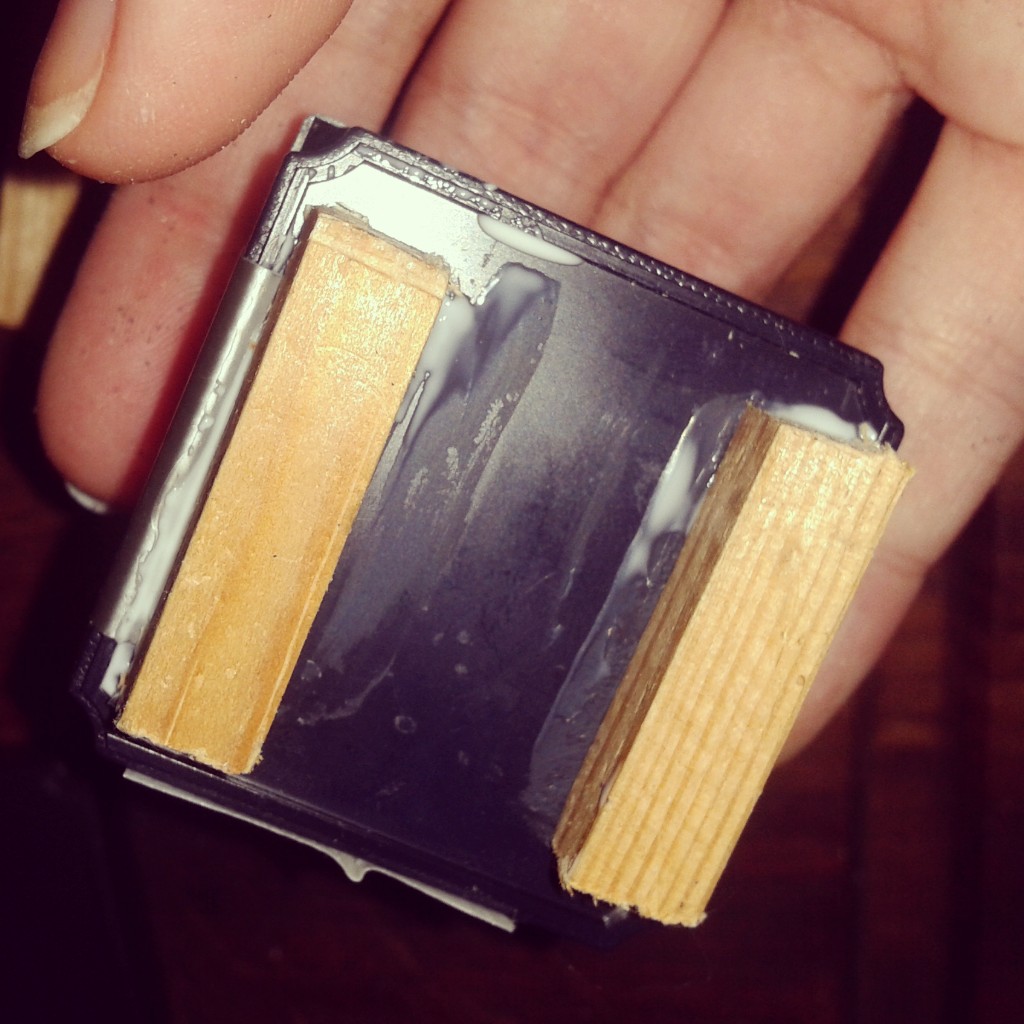
I glued two small pieces of square dowel onto each size of the base to make the legs. I used ductape to quickly fasten together the different parts of the seat. It didnt matter too much about being neat as I planned to cover each chair with fabric later.

IMG_20140302_114540
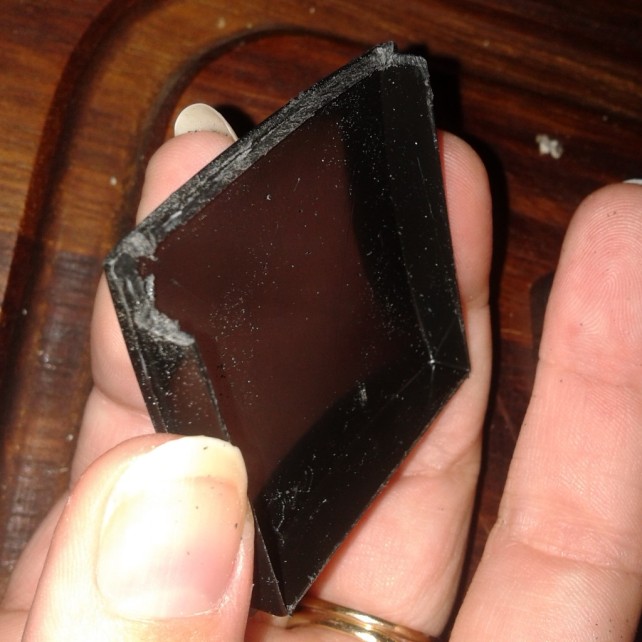
The corner chair was a little bit more difficult as it would require two chair backs/sides and, as I was using the charm box lids, the corner edges would get in the way of one another. I carefully removed one side of one of the lids using a craft knife to allow the lids to slot inside one another at the corner.

IMG_20140302_115114

IMG_20140302_115250

I covered the front indent of the chair back with a piece of plastic to make it easier to cover the chair with fabric later on in the process.

IMG_20140302_115535

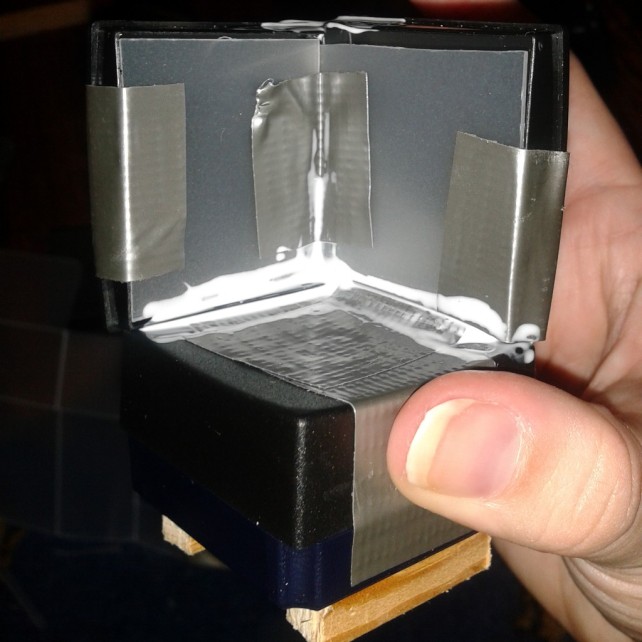
This was then repeated for each of the individual chairs until finally my sofa suite was complete!

IMG_20140302_115742

Then to cover each sofa in fabric!

The first challenge here was to decided what fabric to use based on the already colourful decor in the lounge..

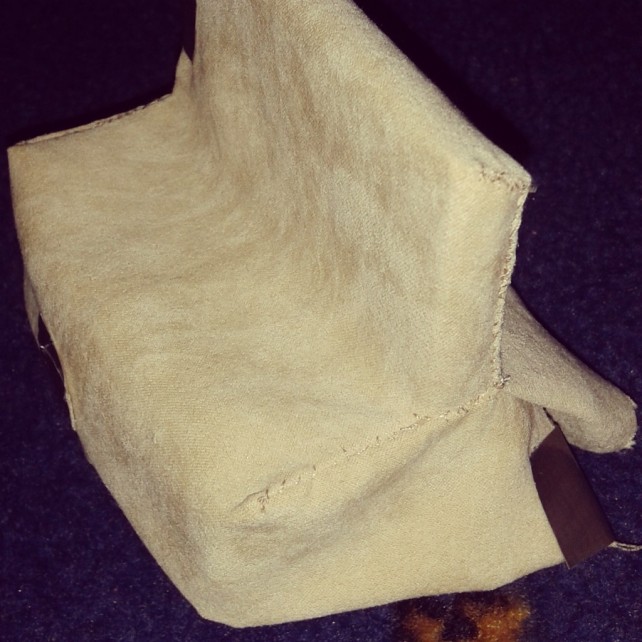
I settled for a boring cream but intend to add more colourful cushions and additions later on.

I tried to use a single piece of fabric for the whole sofa to avoid it looking too messy. I placed cuts on either side to shape the fabric as required. This was a very long, frustrating and trying process and I’m sure there would be an easier way to do it than the method I used…

IMG_20140302_120110

However eventually the main sofa was completed! I added a trim using a thin ribbon which I ruffed before attaching to the bottom of the sofa (covering the legs).

IMG_20140302_120213

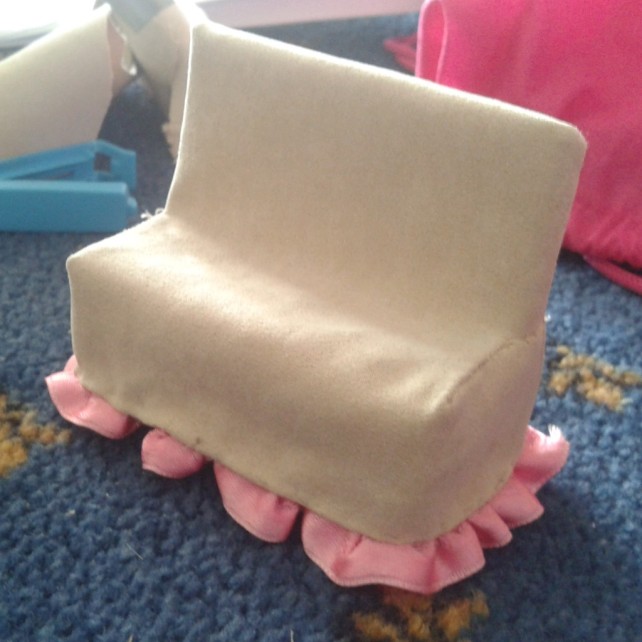
Just 2 more to go now…


Lighting: Plugs, wires and jars!

One of the very last items I bought for my childhood dollhouse was a working fireplace but unfortunately it was never actually used. The wires for the light didn’t arrive with a plug on the end and at the age of 10 this was a complete no go… I was planning on figuring it out this time around, although 12 years later I was still as clueless with this sort of thing. Luckily, I stumbled upon this image whilst browsing through websites for outside lanterns! I wish information like this was sent with the items and not assumed as a given fact but oh well!

(Image from: http://www.dollshouseparade.net)

Sure enough it is literally a case of removing the pins, inserting the wire and replacing them. It finally works!

IMG_20140223_143424

I have taken this success as a sign that I am now a fantastically talented electrician and therefore am intending to jump from this to converting an old broken chandelier into 3 jar lights which I have seen elsewhere and love. A big jump to say the least! *Fingers crossed*

I started  by dismantling the original chandelier which consisted of 5 individual metal arms which all connected up at the base. I sacrificed the first arm in an attempt to work out how the new lights would need to be wired in order to work and not cause a fire! The second sadly broke when I tried to remove the outer metal casing. Thankfully the final 3 removals were a success! It would have been ideal to leave behind the wire casing on all 3 but this was not essential (I hope). I bet you can guess which one I did last anyway, practice does make perfect!

IMG_20140223_142310
Next I needed to find some jars which I didnt mind sacrificing to make the casing around the the bulbs. I used 3 kitchen jars from my old dollhouse. As I have yet to install a kitchen in this house I figured it wouldn’t be too much of a problem…for now anyway!

IMG_20140223_142435
IMG_20140223_142541

Now comes the tricky bit!

It would have been easier to wire the 3 lights seperately with 3 seperate plugs, however given that my house has 10 rooms which will all (eventually) have lighting, this wouldn’t be practical. Therefore, I decided to connect them all together in a triangle formation with one wire connecting them to the ceiling. One wire would be required to connect together the wires leaving each blub and a seperate wire used to connect the base of each light together. Let the soldering commence!

IMG_20140223_142800

Ta-dah! It works!

IMG_20140223_142704

Now it was necessary to ensure that the two sets of wires never meet, the reason why keeping the original wire casing on would have been advantagous! I used a sealant glue to cover the wires leaving the bulbs, protecting them from the wire above.

IMG_20140223_143012

Finally I glued the jars into place and waited for them to dry.

IMG_20140223_142903

IMG_20140223_143215

Now all that’s left to do is cover the wires and install the finished light!

The Ballroom

Today’s challenge.

I almost have no idea where to begin with this room it’s so large. Two floors but the upper overlooks the lower with a balcony. I know that I want to hang a chandelier as this room would be perfect and i’ve secretly always wanted one however I cant afford to invest in that just yet and I’m not sure how else to dress this room.

I’ve considered the possibility of wallpapering and painting, or a little of both. Potentially varnishing the staircase to enhance the burnt wood shading effect from the laser cutter. Tiling or carpeting the upper and lower floors, or both. I just cant decided what to do or where to start. Even google is unable to provide inspiration for such a huge dollhouse room.

1922275_10152205460815033_25010960_n

And so for now, as I do with all my rooms when I’m lacking inspiration and just want to do something I’ve painted it cream…

1920625_10152205460445033_1251990891_n

Inspiration welcome… urgently!

A Room for the Children

This is one room which my previous house was too small for. I decided to make it another of the attic rooms, leaving the larger rooms for areas such as the kitchen and bathroom. I think making a room for children has a lot of potential. Bright colours, creative shapes and exciting objects.

I decided to begin this room from the floor upwards. I had some small scraps of paper (craft paper for card making not wallpaper) which I decided to base the floor around. I didnt have enough of one particular design to cover the whole floor in one particular pattern and so decided to go with a patchwork effect. Initially my idea was to tear different sized pieces for the flooring like a scrap book however this didnt look particularly effective and I felt the need to tidy the pieces up which defeated the initial purpose. I then settled for cutting retangle and square shapes instead.

1798817_10152205460710033_1478595597_n

Each piece was then carefully laid into place and stuck down with a glue. Luckily I had enough of each colour piece and the shapes I created covered the flooring nicely without too many skinny pieces near the edge or crazy overhangs. Once the floor had been completely laid down I coated it in a final layer of PVA to give it a sheen effect similar to that of a vinyl.

1888600_10152205460590033_1784784183_n

I decided to paint all the walls white for fear any patterns or colours would detract from the flooring I had just created. Particularly as the attic rooms are fairly small once furniture has been inserted. Again I only used item to decorate which were left over from my previous house. I globe light is a particular favourite of mine and I’m sure it will get moved from room to room as I go along before I find it a permantent home. The baby’s dress and the blankets were all hand-crocheted which are a lovely finishing touch.


1743466_10152205459960033_629146772_n


I made the hanging mobiles on the cieling from laser-cut star shapes I found in one of my craft drawers. Colouring them in with a permanent marker pen gave then a metallic sheen which I think add nicely to the feel of the room.

1896970_10152205460025033_1084410373_n

1959666_10152205460125033_1763115070_n
Looking through the window.

1896940_10152205460255033_1018885778_n

Decorating the Lounge

1965025_10152205459690033_1501678811_n

I used the free wallpaper samples again for this room on the flooring and one of the walls. I was slightly worried that the flower pattern for the wall would be too big as it was intended for an actual house however I carefully positioned it so the biggest flower would be cut out for the doorway and I think the result is very good. I pained the remaining walls a magnolia colour and installed a ceiling light left over from my previous dollhouse. The fireplace also contains a working red flickering light however is still to be installed. This room was smaller than the lounge in my previous house for a lot of the furniture, particularly the sofa, seem too big and so I will probably get a new one at some stage. Until then I decided to try some other options, such as a dressing room.

1622858_10152205459215033_853088721_n